Go Back  RCU Forums > Radios, Batteries, Clubhouse and more > Control Lines
Reload this Page >

Crankcase pressure setup Voodoo

Community
Search
Notices
Control Lines For all you fly-by-wire fanatics!

Crankcase pressure setup Voodoo

Thread Tools
 
Search this Thread
 
Old 04-26-2024, 06:02 PM
  #1  
jayseas
Senior Member
Thread Starter
 
Join Date: Jun 2009
Location: Idaho falls ID
Posts: 368
Likes: 0
Received 0 Likes on 0 Posts
Default Crankcase pressure setup Voodoo

I know this must be posted before but i can't seem to find it or i just don't understand. When using crankcase pressure off the 36X is there just two lines, 1 line to the pickup tube, and the pressure line off the crankcase to the tank. No other vent line correct. or do i need the vent on the tank for refueling thru the pressure line and cap it off after filling the tank?
thanks
Old 04-26-2024, 11:17 PM
  #2  
qazimoto
My Feedback: (1)
 
Join Date: Sep 2005
Location: Central Coast NSW, AUSTRALIA
Posts: 1,457
Received 12 Likes on 12 Posts
Default

Originally Posted by jayseas
I know this must be posted before but i can't seem to find it or i just don't understand. When using crankcase pressure off the 36X is there just two lines, 1 line to the pickup tube, and the pressure line off the crankcase to the tank. No other vent line correct. or do i need the vent on the tank for refueling thru the pressure line and cap it off after filling the tank?
thanks
Yes, you can use just two vents. Firstly the fuel vent in the normal place. The pressure line to the tank can just be a tube into the top inside corner of the tank, or the uniflow breather pipe on that style of tank. Either will work just fine. You could add a filling pipe and seal it off when full, or fill through the pressure pipe and use the fuel vent as an overflow. This would mean pointing the model nose down while filling.

We used to limit the engine pressure nipple hole to .012", using the solder and c/l wire trick to help tuning.
Old 05-03-2024, 10:31 AM
  #3  
markwesti
Junior Member
 
markwesti's Avatar
 
Join Date: Apr 2024
Location: Seal Beach , Ca.
Posts: 6
Received 0 Likes on 0 Posts
Default

I'm' setting up a McCoy 29 that has a front air intake and needle valve , I would like to use a rear mounted needle valve on it . I read you must use a pressure fuel tank , this engine has no muffler . How can I get crank case pressure to the tank ?
Thanks , Mark .
Old 05-03-2024, 11:06 PM
  #4  
qazimoto
My Feedback: (1)
 
Join Date: Sep 2005
Location: Central Coast NSW, AUSTRALIA
Posts: 1,457
Received 12 Likes on 12 Posts
Default

Originally Posted by markwesti
I'm' setting up a McCoy 29 that has a front air intake and needle valve , I would like to use a rear mounted needle valve on it . I read you must use a pressure fuel tank , this engine has no muffler . How can I get crank case pressure to the tank ?
Thanks , Mark .
A pressure tap in the backplate is probably the easiest method. Du-Bro used to sell a pressure nipple together with a suitable sized drill and a 10-32 tap. Still available less the tap and drill. In the old days we'd run a 1/8" Whitworth (similar to a 5:40 UNC) die down a piece of 1/8" Copper tube and screw a brass nut down the thread. Almost anything will work. Now days you could reinforce the thread in place with JB Weld. Make sure than none of the screw protrudes into the engine internals.

We'd also restrict the inner hole in the nipple to about .012" - .015" for more reliable needling. A few years ago I did this to a K&S nipple with a bit of c/l wire and JG Weld inside the nipple. Fill the nipple, Pierce it with the wire, leave it there till it is semi hard, pull it out. It should leave a hole about .012" or so diameter. In the 1960's we used solder to do much the same. Plumbers solder not electrical works best. Coat the wire with carbon soot first if using the latter. Plumbers solder doesn't solidify instantly. It has a "mushy" phase to it's solidification.


Click image for larger version

Name:	qaz999.png
Views:	6
Size:	166.5 KB
ID:	2274153

Last edited by qazimoto; 05-04-2024 at 02:06 AM.
The following users liked this post:
markwesti (05-04-2024)
Old 05-04-2024, 07:34 AM
  #5  
markwesti
Junior Member
 
markwesti's Avatar
 
Join Date: Apr 2024
Location: Seal Beach , Ca.
Posts: 6
Received 0 Likes on 0 Posts
Default

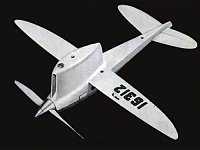
Thanks again qazimoto , that tells me what I need to know . I'm building a B speed plane . Plans are from the 50's it's called the "All American" . I know it's a C but I'm putting a McCoy 29 in it .I also started with a Harter's B pan .
Mark .
Click image for larger version

Name:	s-l500.jpg
Views:	10
Size:	16.1 KB
ID:	2274154

Last edited by markwesti; 05-04-2024 at 07:36 AM.
Old 05-04-2024, 01:20 PM
  #6  
GREG DOE
 
Join Date: Jul 2005
Location: , TN
Posts: 901
Likes: 0
Received 27 Likes on 24 Posts
Default

On some engines the upper left rear cover screw hole goes all the way through to the inside of the crankcase. If your engine has the through hole, replace that screw with a 4/40" nipple.
The following users liked this post:
markwesti (05-04-2024)
Old 05-04-2024, 01:49 PM
  #7  
markwesti
Junior Member
 
markwesti's Avatar
 
Join Date: Apr 2024
Location: Seal Beach , Ca.
Posts: 6
Received 0 Likes on 0 Posts
Default

Originally Posted by GREG DOE
On some engines the upper left rear cover screw hole goes all the way through to the inside of the crankcase. If your engine has the through hole, replace that screw with a 4/40" nipple.
Thanks Greg , I'll check that out when I take the 29 apart .

Posting Rules
You may not post new threads
You may not post replies
You may not post attachments
You may not edit your posts

BB code is On
Smilies are On
[IMG] code is On
HTML code is Off


Contact Us - Manage Preferences - Archive - Advertising - Cookie Policy - Privacy Statement - Terms of Service -

Copyright © 2024 MH Sub I, LLC dba Internet Brands. All rights reserved. Use of this site indicates your consent to the Terms of Use.